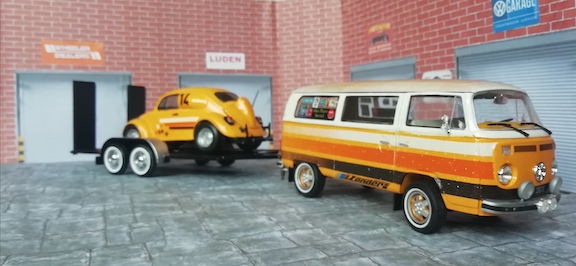
Without giving the game away so early in a review, it is safe to say that Revell has once again come up trumps with their VW Bus model.
So there you go. Enjoy the pictures and get buying. However, if you have a few spare minutes, stick with me as I talk about the good bits of this kit I dreamed of when I had pockets full of pocket money and not a mortgage to pay because I’ve loved the VW T2 since time began.
Comprising of 109 parts over 12 sprues of mostly orange (body) black (chassis) and silver (engine), the build-up of the is quick. With Revell’s “easy-click system” there is no waiting around for glue to dry or glue to sniff. If you do want to spend just a bit more time with the build-up, painting the details does add enjoyment to the process.
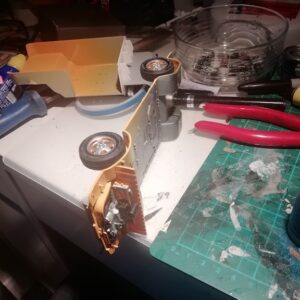
The start is quite the standard format and starts with the chassis. Moulded in black, there isn’t much to do here except add some colour or a few silver details like gear box and driveshaft details. The painting will bring parts alive but like their Beetle, it lacks any front suspension detail using the lower section of the front beam. The rear is a little more detailed including full rear suspension.
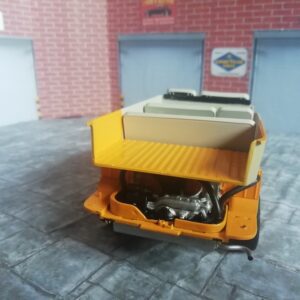
The engine choice for this model is a welcomed change from the norm as to what you would expect. Why did they choose this engine? International modelling markets. Revell has opted for the T4 engine that was also used in the VW 411, 412 and Porsche 914/4. In countries like the US, it became the standard engine instead of the T1 Beetle engine. It’s nice to fit together even if it doesn’t come with carburettors. These are moulded into the firewall and easily detailed with paint.
Speaking of international markets, you will also notice on the glass sprue that parts 97 to 100, not used on this or the Westfalia Camper kit #07676 are US side markers and the body has internal markings to show where to drill for these. So if you fancy making it a full US-spec bus, you have no excuse.
The rest of the engine and bay is made up of just 6 parts. A random pipe comes through the tinware into the firewall. For the life of me, I have no idea what this pipe is. Again this area is not given the attention to detail it deserves. They don’t show in the instructions the details to paint it correctly but the engine on the box does give a far better idea of what you are aiming for. The same can be said when looking at the engine from the underside. For a T4 engine, it looks incredibly small and lacks the joyous details of Revell’s Beetle kit.
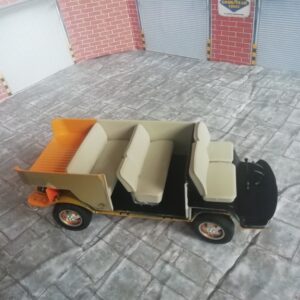
The interior is of the 9 seat microbus configuration with 3 bench seats. There isn’t much in the way of where to add details so you are given a blank canvas to do what you like. It does however get better upfront with the dashboard. It is full of accurate details down to the handbrake handle and post. The stickers for the dials show the level of accuracy Revell has gone to for an area that once built is lost unless you look hard. The dials consist of USA warning lights for the EGR valve and CAT. Alternatively you can choose the European Bus with its standard 4 warning lights. There is also a deluxe clock sticker. A small detail but if you have tried finding a clock for a T2, you’ll appreciate this expensive option.
I won’t lie, the body is the best part and the main thing you’ll see when completed. It is a complex build comprising 8 parts. The added extra is it is all built to be open. All doors including the engine lid open. As an open static model, this is great. Close it all up and it is a bit of a different story. The panel gaps can put a Tesla to shame. Glueing the opening panels closed might defeat the immersive joy but it will give you a better static model if you want it closed.
My Achilles heel with most Revell kits is the fear of the windows. Glue stains have ruined many of my kits in my past. Thankfully this is not a worry with the click system. There is now no fear of having to make new windows. They push in with ease and without glue!
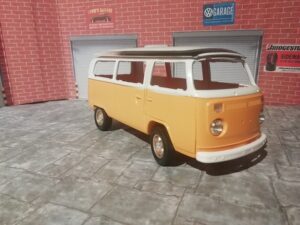
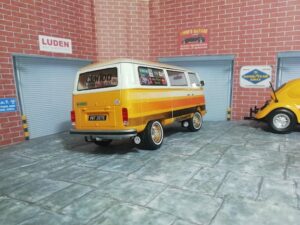
The orange body moulding makes changing a colour an issue because you need to apply a few coats of paint to cover it up. This makes fitting some items like the door mirrors and engine kid more involving requiring some modelling skills to make the holes larger or removing paint and then using glue to hold them in place.
For those pedantic enthusiasts, they will note the use of a post-76 sliding door on a pre-74 body shell with a fuel filler flap. Some will even go further and say part B4 (firewall) should be grey. I can recommend looking up your VW’s in books when painting will immerse you in the experience a little more. Or just make you out to be a bit nerdy. Either way, it all adds to the fun.
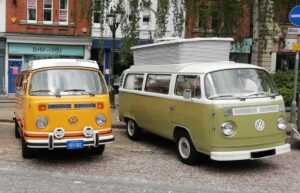
There are a few things I didn’t like about this kit. Firstly, the front bumper. Revell has I’m sure, moulded it upside down. It sits too low and gives the Bus a droopy look. Easily remedied by removing the locating posts and just fitting it upside down. This then raises the bumper for a more authentic look. There are also those fine details that appear to be sort of afterthoughts. The size of the engine when viewed underneath leaves you a bit disappointed. As for the lack of details on the side panels inside the rear passenger area, would it have been so hard to mould in the details?
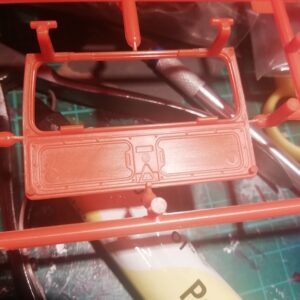
The final part I don’t know if it’s like an Easter egg or not but it is a bit geeky. The tailgate moulding doesn’t have a door card. It shows the inner structure and lock. I’d love to have seen what Bus they used to take the details from.
